The installation of Silex element panels is a very important step in creating aesthetically impressive and durable spaces.
Be sure to observe safety precautions and follow proper techniques to achieve flawless results.
It all depends on the ability of the person installing, the scope and level of difficulty of the project.
The 48''x96'' panels are large and very thin, so it is normal for them to be slightly curved when received. If this is the case, it is possible to restore them to their original shape by following these steps:
1. Slightly wet the back of the panel. This will reintroduce moisture into the panels and restore them to their original shape.
2. Place the panel finished side down on a level support.
3. Distribute weight (not excessive) on top for 24 hours.
It is possible to stack several panels.
Silex element does not necessarily recommend making joints between panels. If you choose not to do them, we recommend that you paint the wall a color that comes as close as possible to the panels for a homogeneous finish.
Joints between panels can be made for a more aesthetic finish, but this depends on individual preferences and the design of each project.
You can use paint tape to protect your panels from mortar overflow.
Before the installation :
You must ensure that the chosen support is suitable for the use you are going to make of it: smooth, clean, able to support the weight of the panels, etc.
If necessary, contact a renovation expert to ensure that your surface is ready to receive the panels.
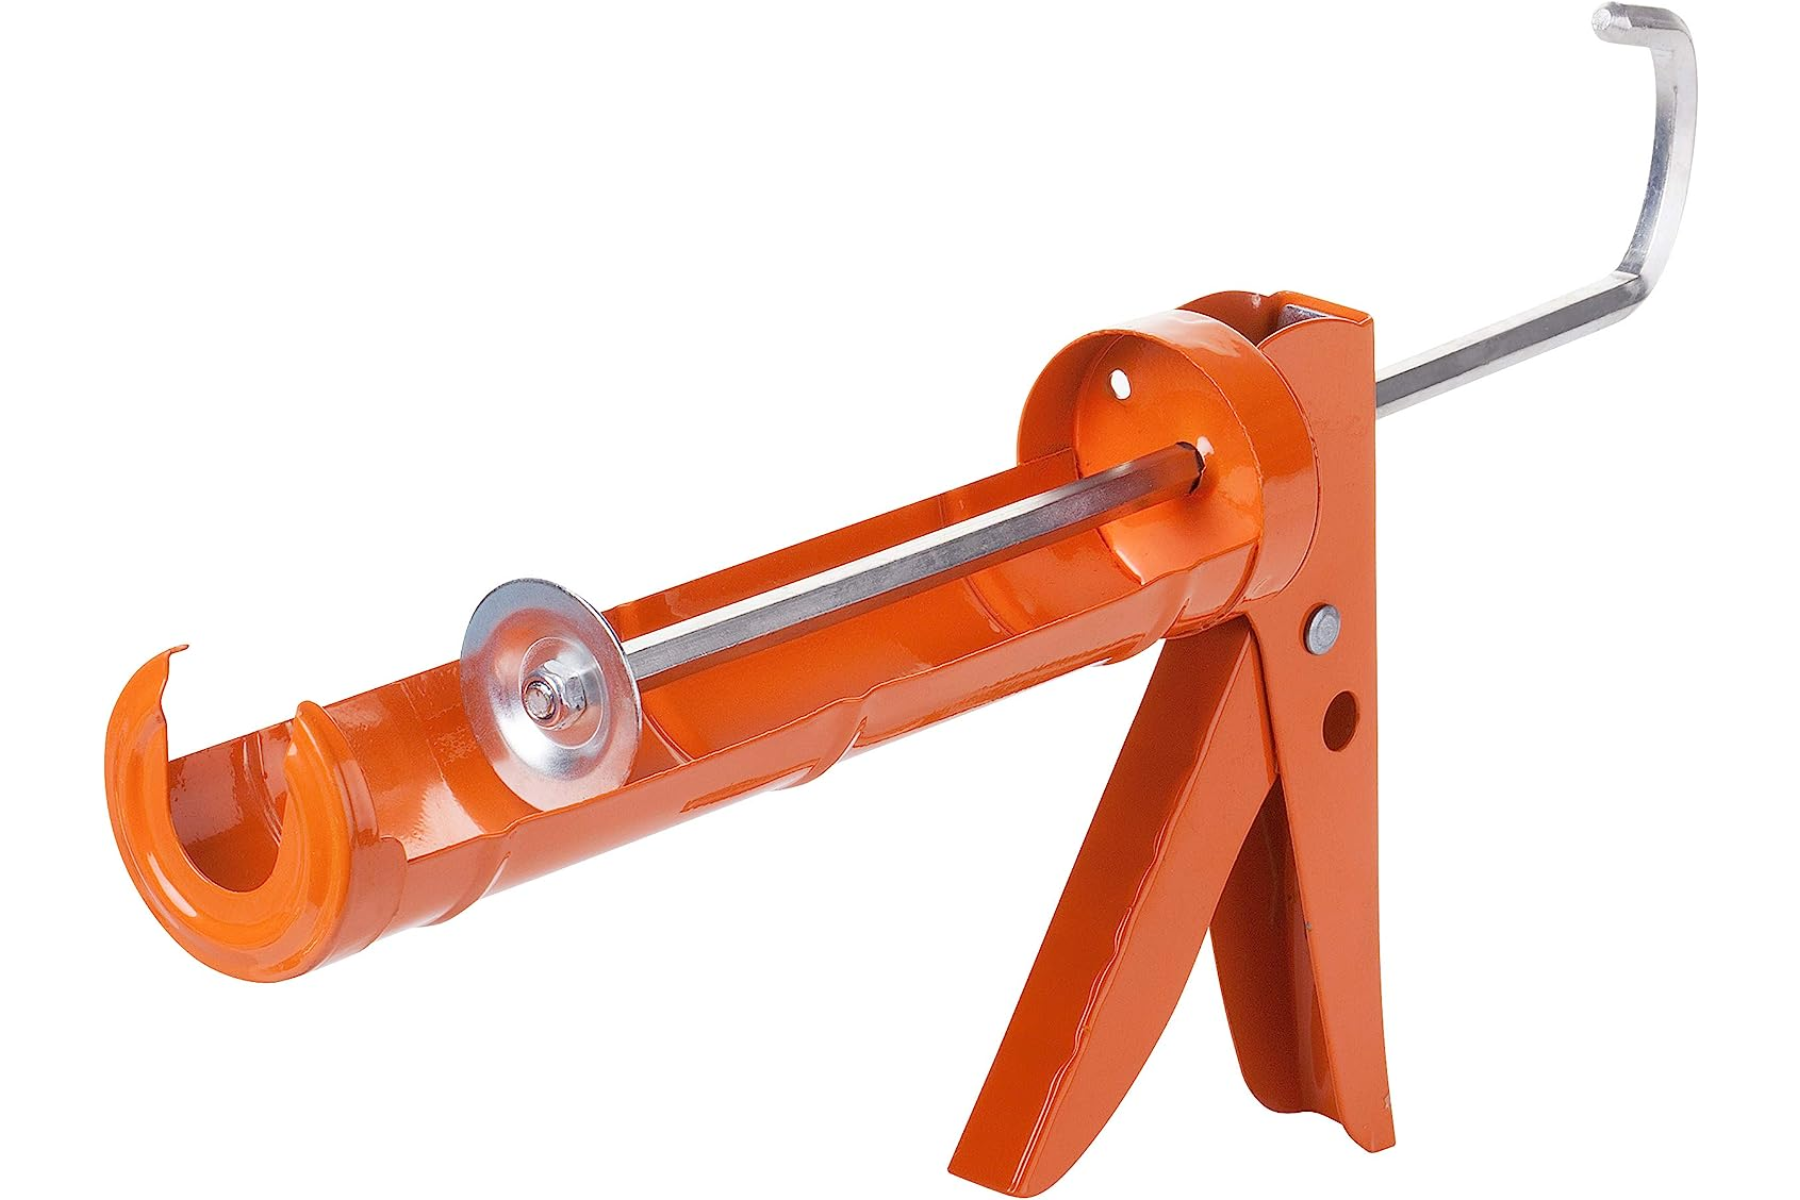
The panels must be glued with a non-water-based construction adhesive. Silex element recommends Adbond Extreme adhesive.
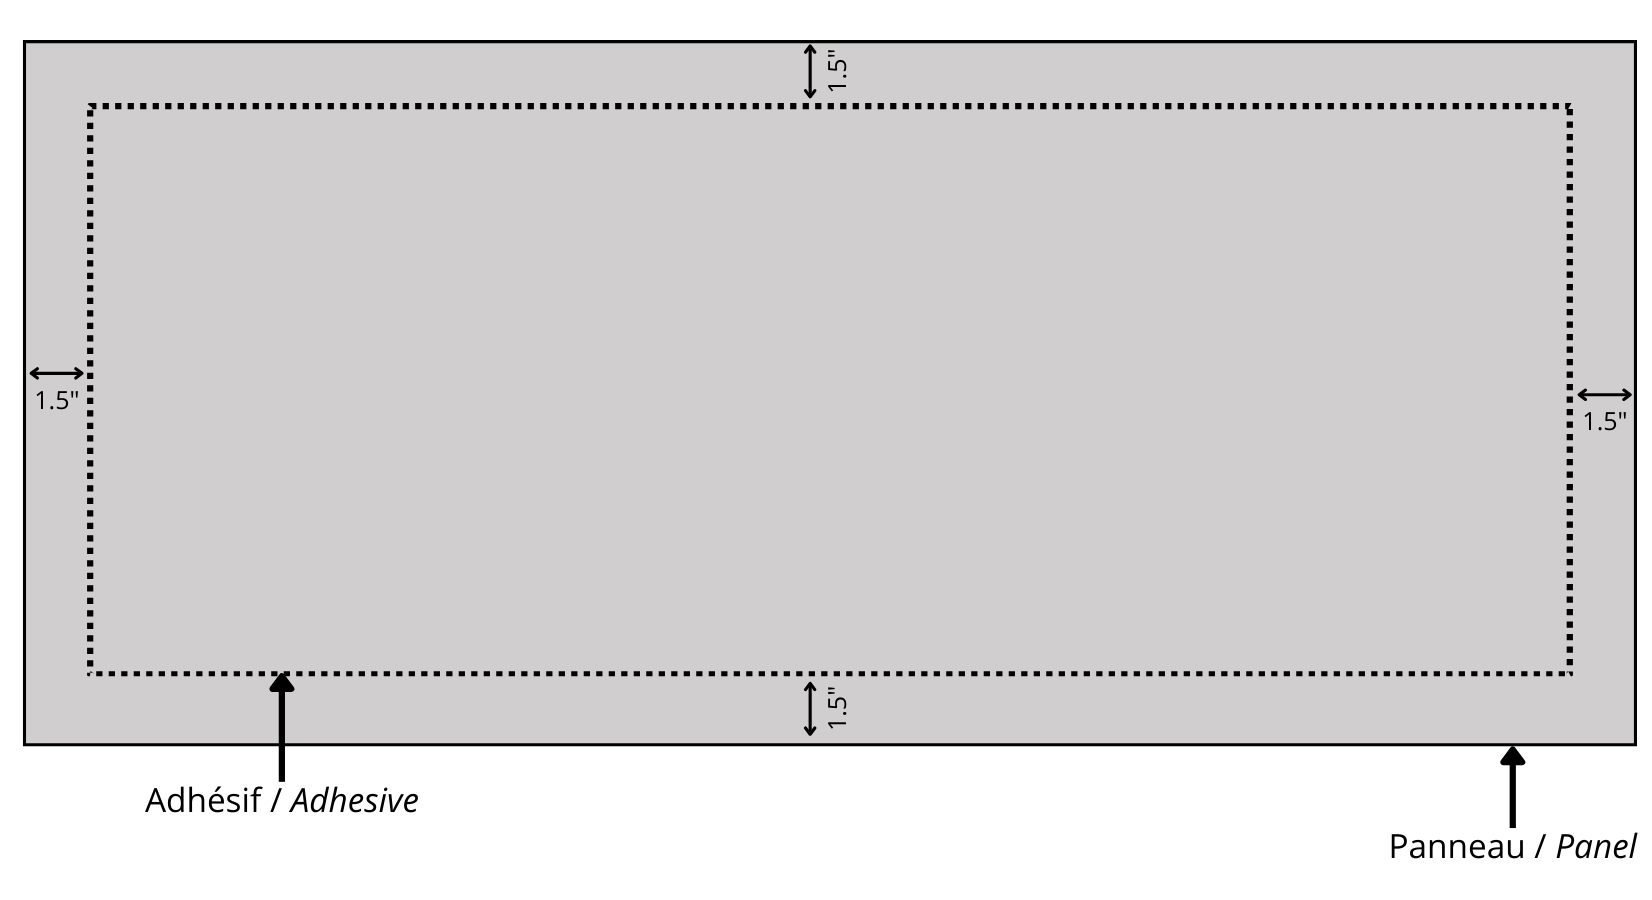
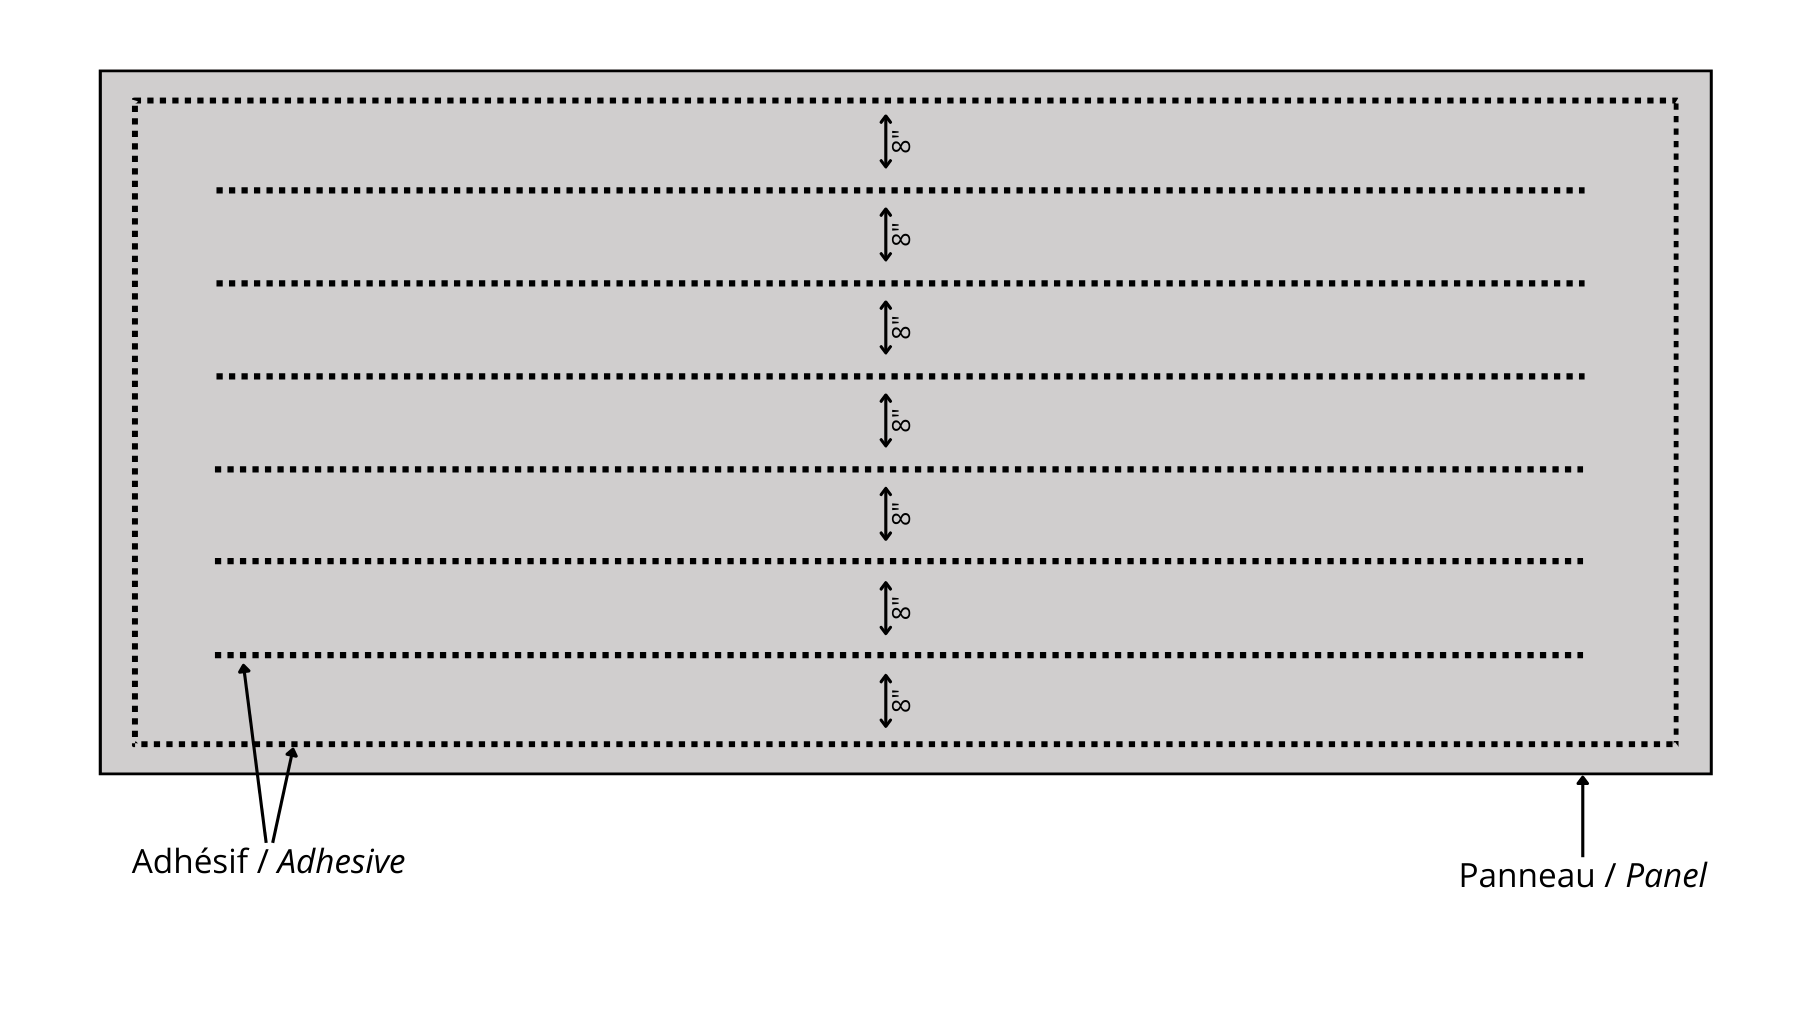
- Using a caulking gun, apply the adhesive around the entire edge of the panel at least 1.5" from the edge.
- Apply the adhesive to the inside of the panel in lines spaced ± 8".
Horizontal installation
Vertical installation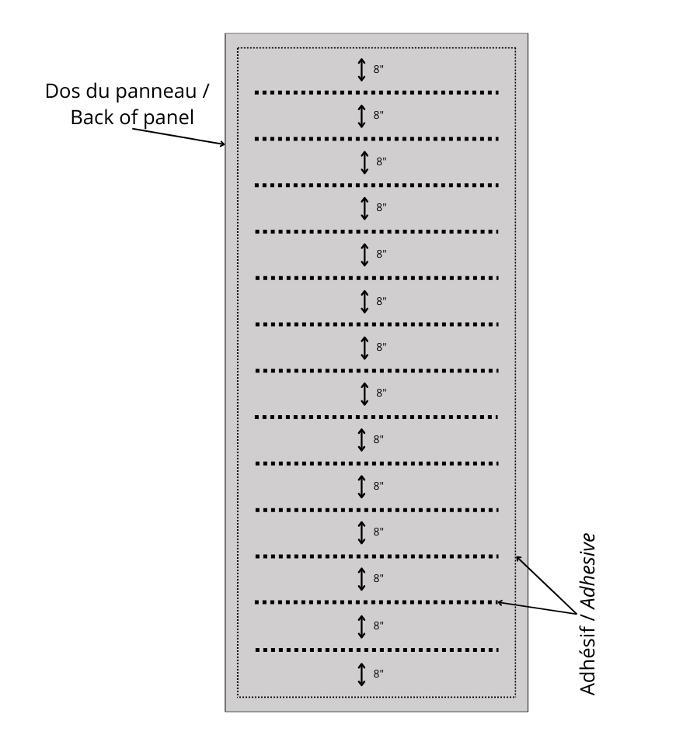
3. Lay the panel on the surface starting from the bottom. Using the level, make sure the panel is straight. Then press it lightly, starting at the edges of the panel. Then apply pressure evenly over the entire surface of the panel.
4. Repeat steps 1 and 2 for the other panels, leaving a space of approximately 2mm between each panel.
It is essential to use one of these installation techniques to install large panels (from 24"x48").
The techniques are to be used in addition to gluing, to strengthen the hold of the panels wgile the adhesive dries (24 hours).
Option #1 is preferred for Lightweight Concrete panels.
Option #2 is preferred for slightly curved panels.
Option #1: Wooden blocks
screw (using self-drilling screws) the temporary support wedges into the joint spaces.
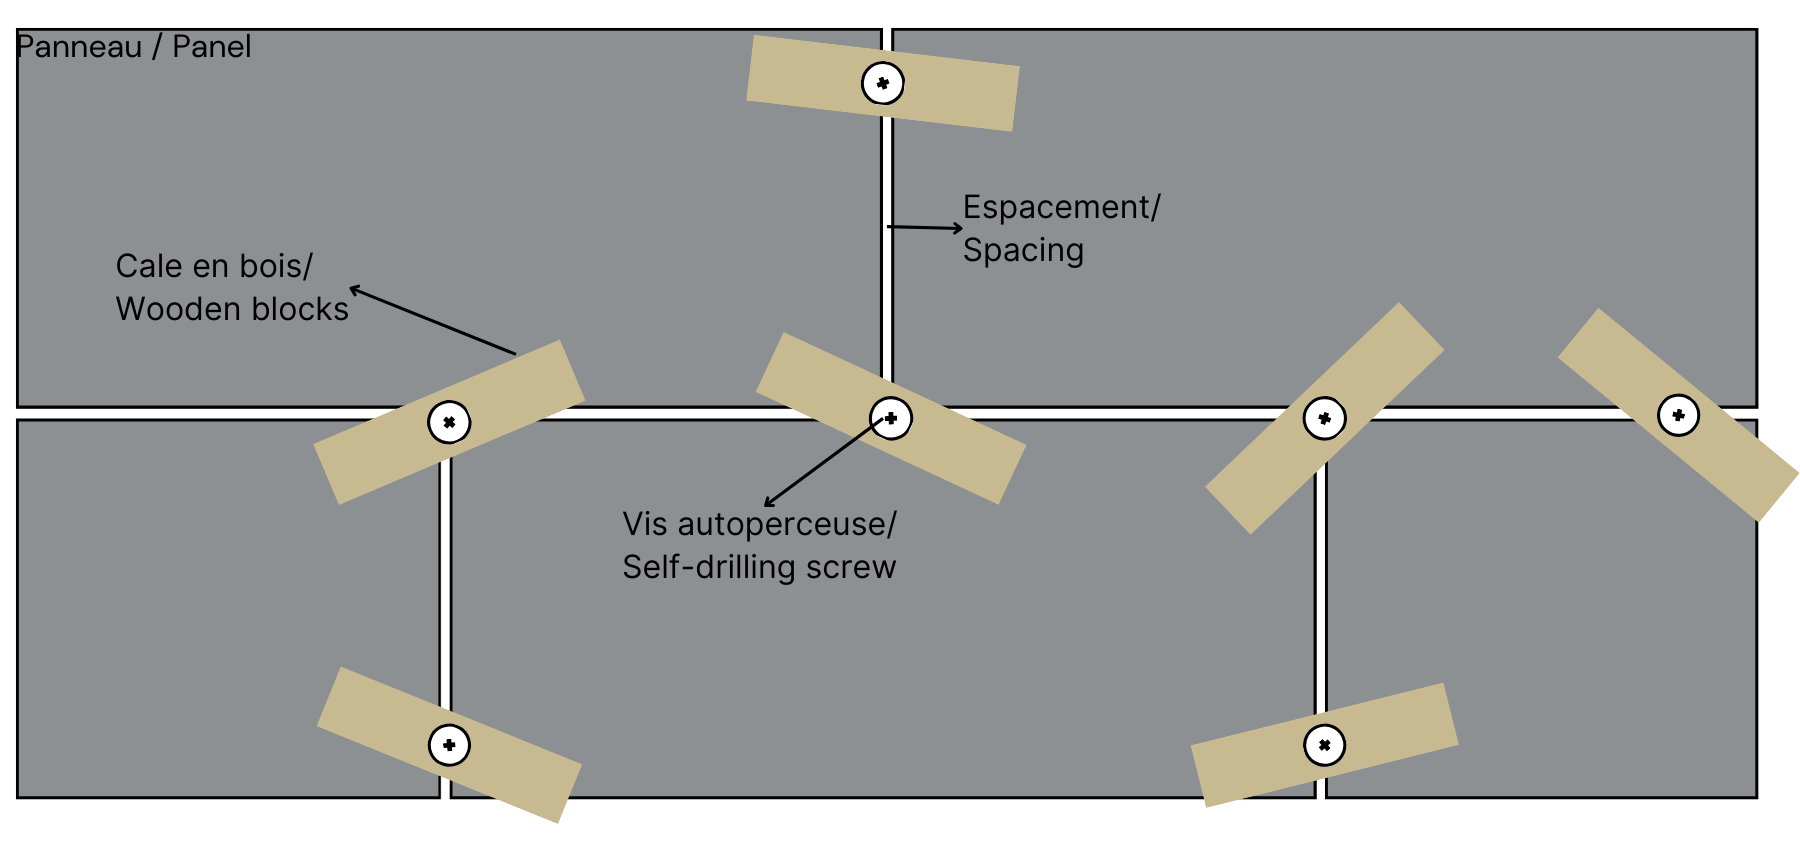
Option #2: Screwing
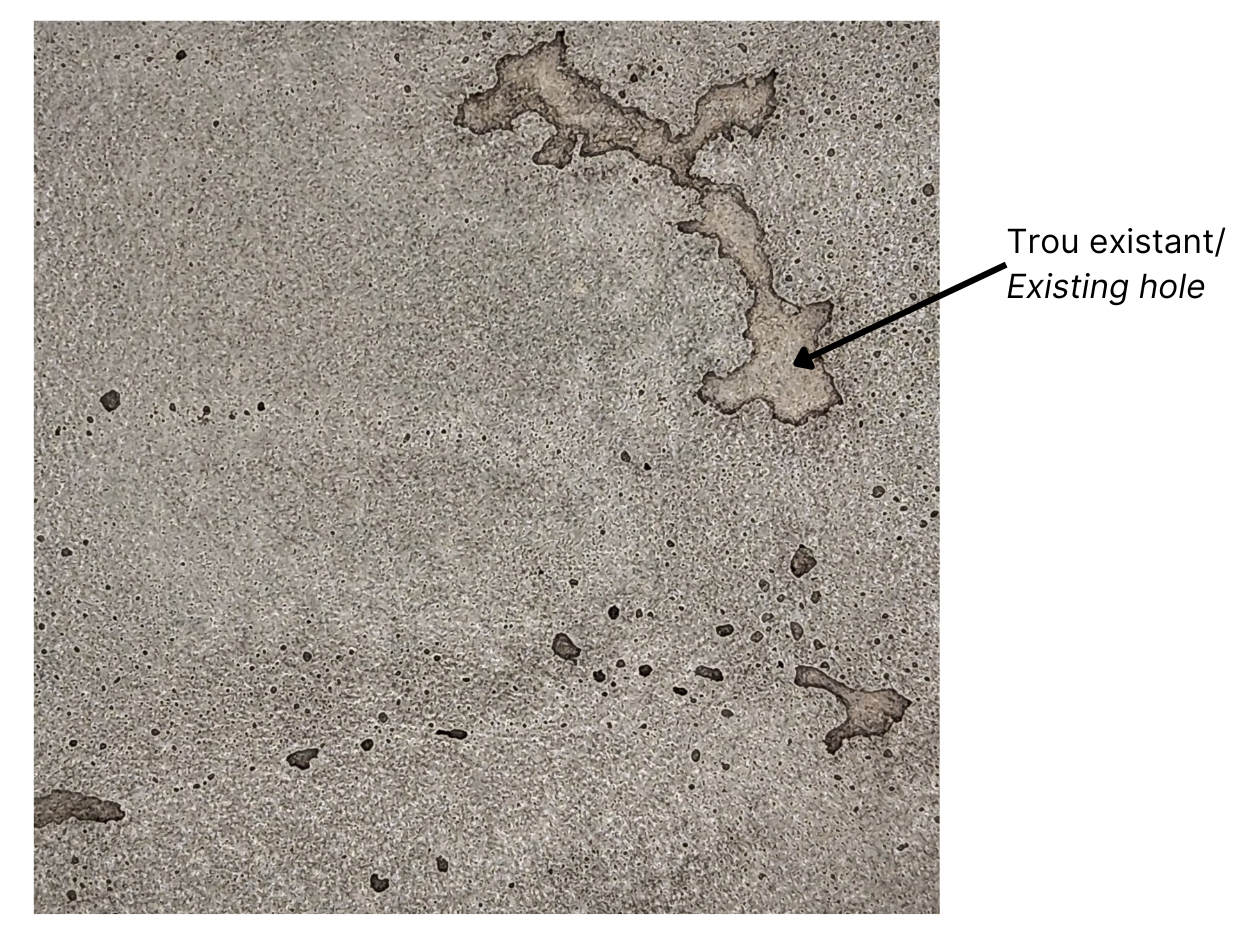
- Use self-drilling screws

- Screw into existing holes in texture panels
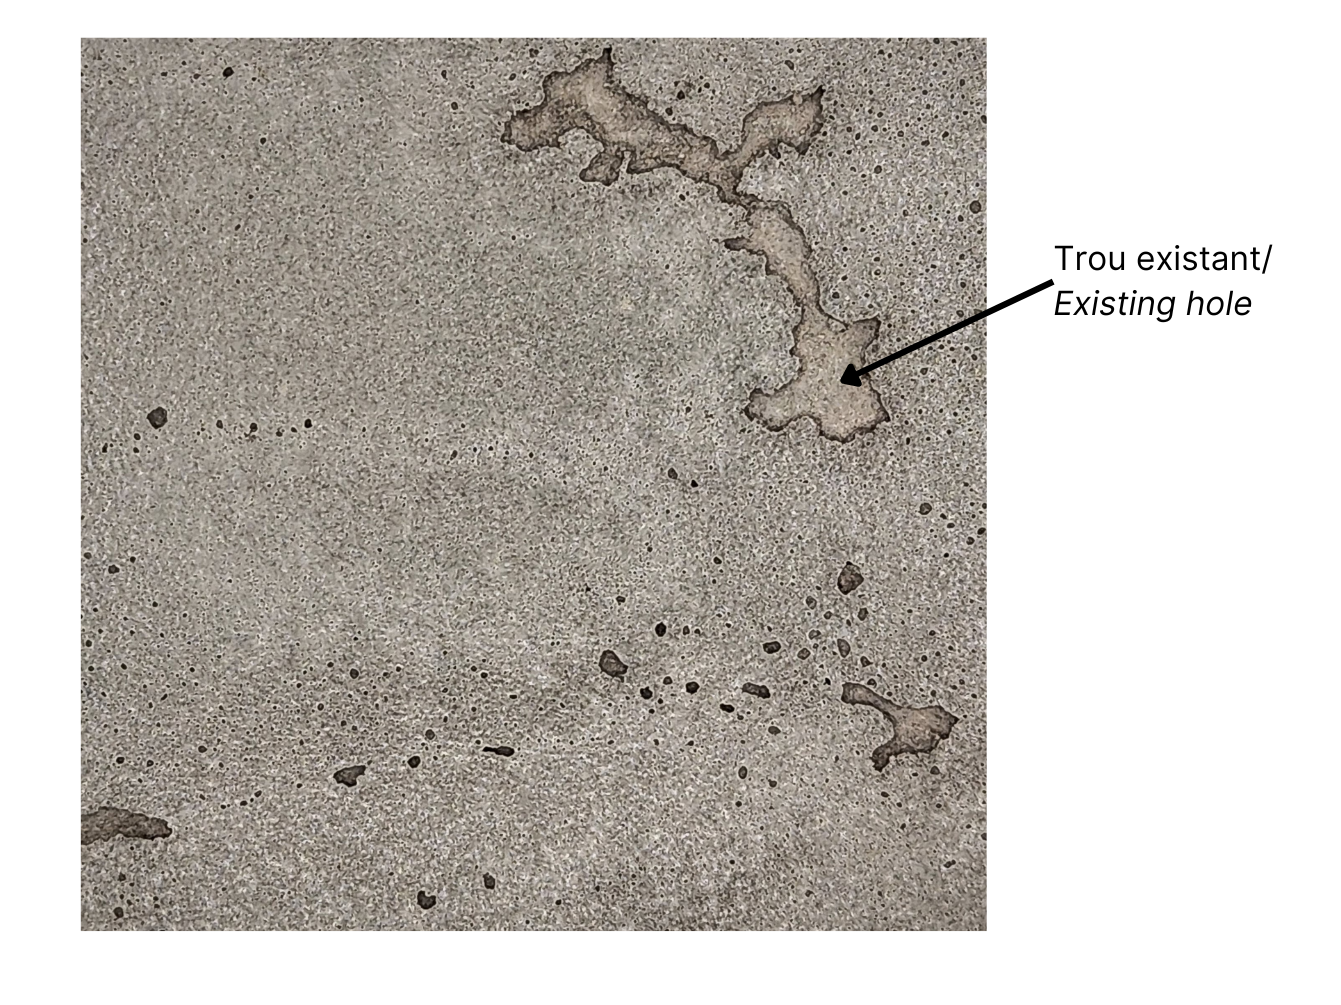
- Leave the screw heads visible

- Remove the screws once the adhesive has dried.

- Fill the screw holes with Silex Mortar (for PDB | Raw finish) or Paint touch-up (for PDB | Metal finish).
Option #3: Nailing
- Use finishing nails (18 Ga).
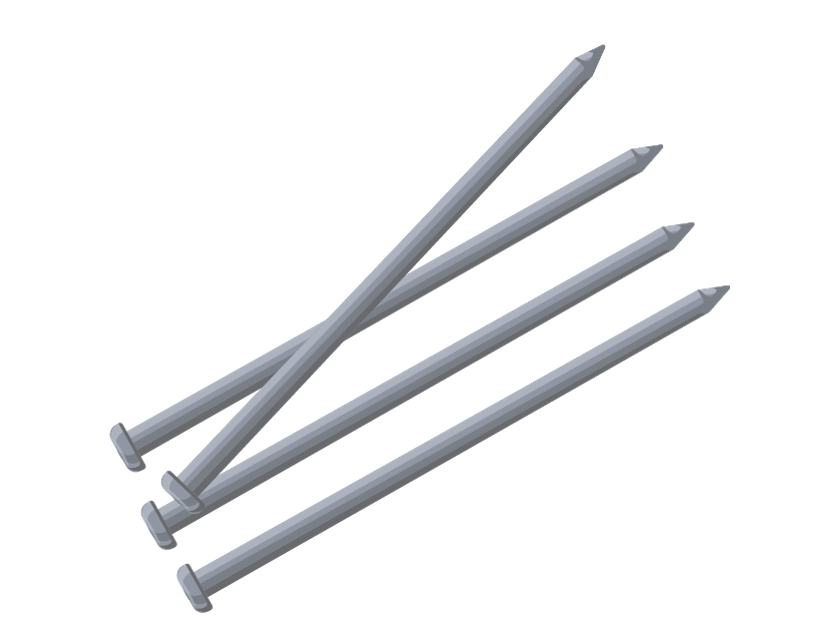
- Nail into existing holes in texture panels.
- Put the correct pressure on the gun.

- If necessary, hide the nail heads with Silex mortar (for PDB | Raw finish) or touch-up paint (for PDB | Metallic finish).
To install the panels on the ceiling, you need at least two people (more is better). 
Place each panel - finished side down - on smaller plywood (backing) and raise the panel horizontally to the ceiling. 
Glue and screw the panels.
Although the panels are fire resistant, prolonged contact with heat can alter the panel's finish.
It is imperative to create a space of 3/16” between the (hot) metal and the panel, filling this space with a high heat resistance silicone. Without this step, the panel could be colored.